Valentine Heart Crayons

I saw this little nugget of truth the other day on Pinterest; who else can relate to this?

broken crayons

My 7th grader, who no longer has any use for crayons having graduated to Faber-Castell manga pens and markers, has a crayon collection dating back to nursery school.  Heaven forbid I should throw them away, because, you know, if the Crayola factory blew up and there was a worldwide crayon shortage, he’d be the man.  Crayon apocalypse not withstanding, I decided I needed them for this post.  This is a quick and easy craft that melts down old crayons to make new ones, in this case heart-shaped ones for Valentine’s Day.  A couple of these in a treat bag are a cute alternative to candy for the class Valentine’s Day party.  My son intends to give these to his younger cousins (but I think he might keep one for himself).

I used a silicone baking pan as a mold.  Get the crayons ready by removing the paper and breaking them up into small pieces.  Preheat the oven to 275 degrees.

instamag3
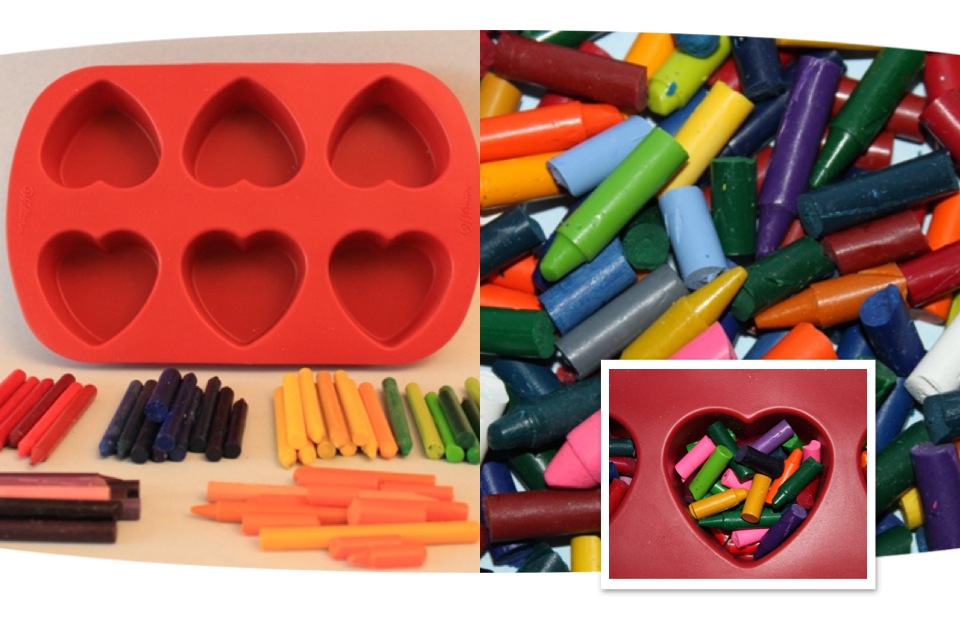
Fill the mold as shown and place in preheated oven for approximately 22 – 25 minutes, checking to see when they’ve melted all the way through; I used a toothpick to swirl the colors.

melted befoe and after

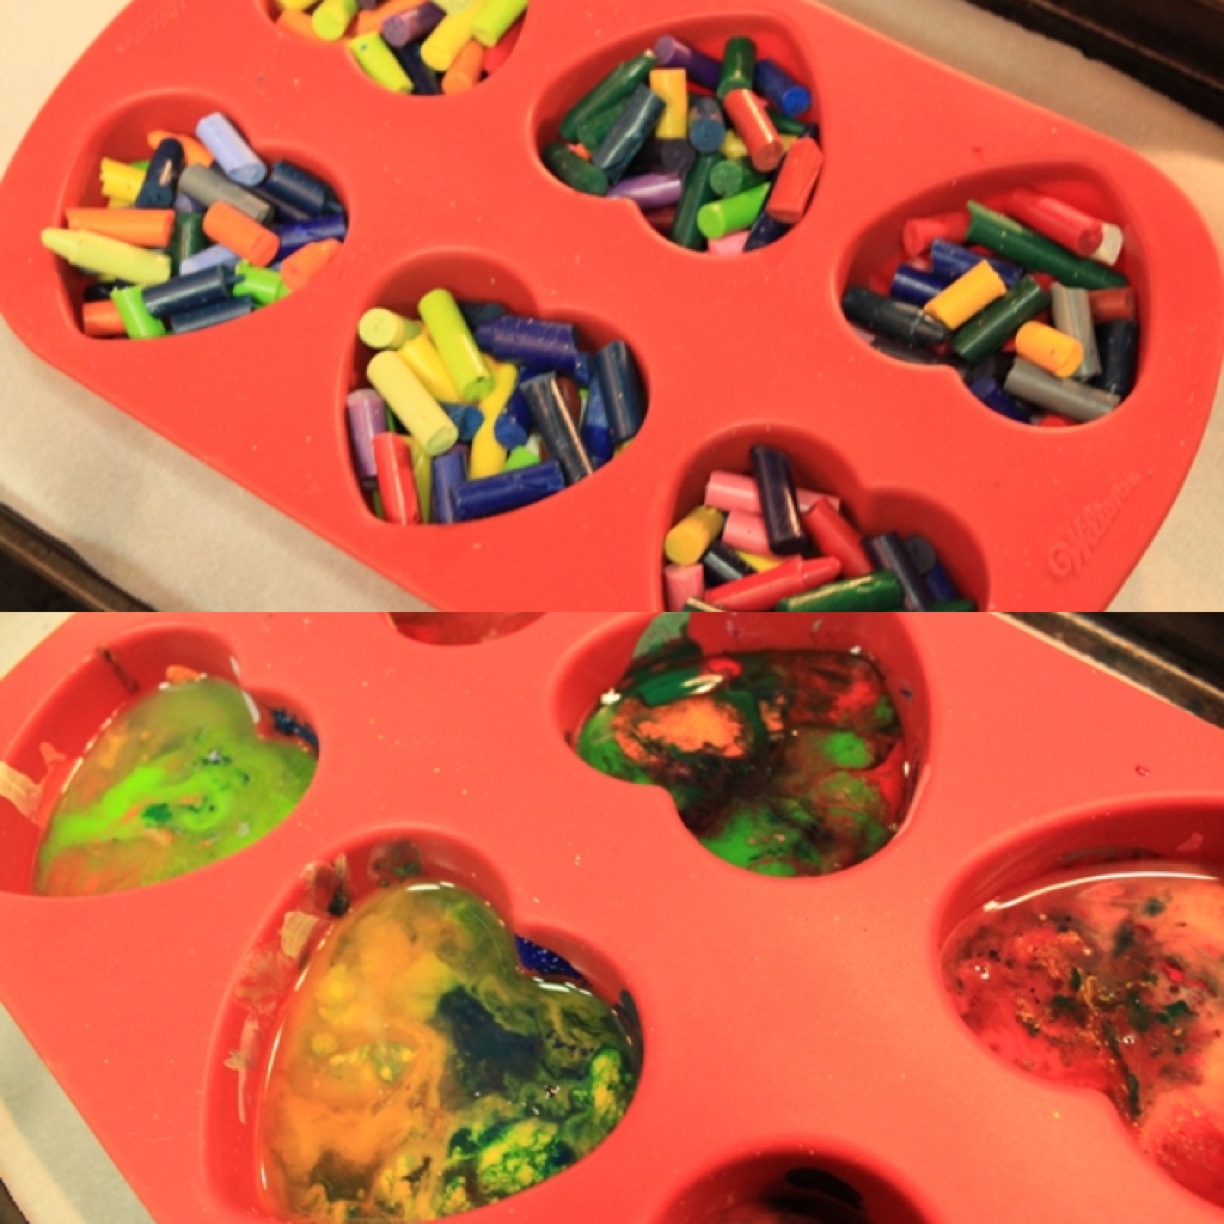
Let them cool in the pan for about 15 minutes, then put them in the freezer for another 5 to 10 minutes. When the crayons have cooled, carefully peel them out of the mold.

instamag

The crayons are easy for little hands to hold, and the swirled colors look great on paper!

v heart crayons

What’s your favorite Valentine’s Day craft?  Let me know in the comments!

heart crayon final

All crayon photos courtesy of mommeetsblog.com

This craft was featured on inspirationdiy.com!  Check out this site for more great craft ideas or submit your own favorite craft here.

Jeweled Candles

This is an easy craft that combines a few of my favorite things – candles, glitter and jewels!  It can be tailored to any color scheme or occasion, and when the candles burn down (if you even have the heart to light them, they’re so pretty!) you can reuse the jewelry components in your next project.  I went with a red, silver and gold theme for the Christmas season.


candle collage


Supplies:

  • Candles

  • Painter’s tape

  • Mod Podge

  • Foam applicator

  • Jewelry components

  • Hot glue gun

  • Glitter

Tape off your candle and apply the Mod Podge to the space in between; be sure to apply a thin coat – if it’s too thick the glitter will come off when you remove the tape (been there, done that). Sprinkle glitter on the Mod Podge and allow to dry (I gave mine about 2 hours). Carefully remove the tape and then use the glue gun to glue the jewels into place.  Here’s the finished product:


candle twins


I decorated a small table in my living room using a vase filled with leftover branches from our Christmas tree and two of the candles:

candles8


How are you decorating your home for the holidays?  Let me know in the comments!


Have a great craft you want to share? Check out Inspiration DIY, where my Jeweled Candles craft was featured!


inspiration diy


Easter Candy Nest

I’m certainly not one to turn away from a lovely Easter basket, but this year I wanted to make something a little different, and was inspired by a nest I saw in a tree outside my terrace.  With visions of chocolate eggs and chicks gathered cozily in a nest dancing in my head, I was off to Jo-Ann’s  for supplies. This is a small nest (the wreath is only 6″) so I made a couple of them to decorate the Easter dinner table. Remember, the bigger the wreath, the bigger the nest and the more candy it can hold!

To make this super easy little nest (it’s so easy you don’t need to read this, just look at the pictures!), you’ll need (clockwise): a paper plate, moss, a decorative butterfly, a grapevine wreath, and excelsior or raffia:


watermark4


 You’ll also need a glue gun (and don’t forget the candy!)

First cut out a circle from the paper plate and glue to one side of the wreath to make the bottom of your nest.  Wad up the excelsior or raffia to and glue it to the paper plate to start lining the nest; then, glue the moss on top of that. 


watermark2


Glue the butterfly onto your nest, add candy and you’re done!


watermark1


Wishing you all a Happy Easter!


watermark5


Six Pumpkin Crafts for Labor Day. . . I Mean, Halloween!

With Labor Day weekend officially underway, folks are still trying to hang on to those last precious bits of summer with cook outs, lazy days at the beach, and last-minute getaways.  But even on this sunny, decidedly summer day, I see signs of the coming fall all around, especially at the supermarket – most notably in the massive displays of Halloween candy already on the shelves.  Move over, s’mores, make way for the candy corn and pumpkin Peeps!  I’m actually ready to bid goodbye to summer, as fall is my favorite season – the amazing foliage, apple picking (and baking!) and of course, Halloween.  My son is getting a little old for trick-or-treating, but we still indulge in the decorating.  We’re going to mix it up this year and try out these alternatives to the traditional jack-o-lantern carving!

Dripping melting crayon wax onto pumpkins turns them into festive Halloween decor (and makes use of all those little crayon stubs):

crayon pumpkins

Does glitter flow through your veins?  It does through mine; I’m going to get my fix with these quick and easy glittered pumpkins:

glittered pumpkins

Colorful tissue paper squares and googly eyes make this embellished pumpkin craft project fun for the whole family!

tissue paper pumpkinThis decoupage lace pumpkin craft lends a lovely vintage look to your decorating project:

Lace-Pumpkin-DIY

Love all things bling?  Jewel-studded pumpkins and a sparkly spider make a bold statement:

pumpkins-with-rhinestones-1010-xl

Try wrapping your pumpkins in black tulle and tying some seasonal ribbons on the stem for this sophisticated look:

black tulle pumpkins

What are your favorite decorating traditions for Halloween?  Let me know in the comments!